Ventrify Process: Shaping ideas into products

Launching a new product is a daunting task for any entrepreneur – financing, marketing, sales, distribution, customer service – oh and product development. In product development alone there are so many technical disciplines involved, and even more steps.

But the same thing that makes product development daunting is also what makes it so exciting. At Ventrify, we’ve built a process to shape ideas into products that people love – and honestly, even though it’s still a work in progress, we’re proud of it.

There’s a lot of uncertainty to in product development – we know. In fact, we thought it wasn’t that complex to start with, so we did it, and we made mistakes. We learned and overhauled our design process. Then, we did it again and again. And after many iterations, we narrowed in on a process that we believe is the most efficient way to develop custom, new hardgoods and consumer electronics on a budget.

A process that allows flexibility, but also provides structure. One that allows quick iterations, and nimble design changes, while doggedly pushing towards an intentional end-goal.

In today’s article, we’ll talk about:

  1. What type of products our design process is meant for
  2. What types of teams this process is built for
  3. The Ventrify Process
    1. Phase 1: Discover & Ideate
    2. Phase 2: Design & Prototype
    3. Phase 3: Engineer & Design for Manufacture
    4. Phase 4: Production Management and Logistics
  4. What didn’t work: The evolution of our process, what we tried before, and why it didn’t work
    1. Unclear scope (aka scope creep)
    2. Not planning ahead
    3. Planning for every detail
  5. Summary

What types of products our design process in meant for

This article will focus on hardgoods and consumer electronics using relatively established technology and limited resources.

Why hardgoods and consumer electronics products? Well, if you’re building an engine, it’s going to be different. And if you’re building a boiler, it’ll be different too. We’re talking about products you’d find in Best Buy or a Home Depot. That’s where the majority of our experience lies, so that’s what we’ll be focusing on in this article.

Now, what does relatively established technology mean? Well, if your PHD thesis is on a breakthrough physics phenomenon, you will have to spend a lot more time on R&D (research and development) than a new electric skateboard or air purifier. We’ll focus on the latter.

What types of teams this process is built for

We’ll also preface our article with a note on resources: we’ve built this process for a small team working on a budget. This is meant for entrepreneurs and startups, not companies with 100+ employees and a $10M budget.

That being said, this is a multi-disciplined journey. Unless you have at least 1 person on your team that is dedicated to only product development, we don’t suggest you try this on your own. Our development team has 1 industrial designer who doubles as a project manager, 1 mechanical engineer, 1 electrical engineer, and 1 sourcing manager that all act as one team.

One team could accommodate 2 more mechanical engineers and 2 more electrical engineers depending on the types of projects. For startups that don’t have 1 client like we do, but are going to market themselves, we recommend having a product manager on the team.

Note that our team doesn’t include software expertise. We’ve found software to be an extremely broad domain on its own and have found better success in partnering up with software-dedicated teams on projects, so our process does not include the software development.

Working with the Right Framework: The Ventrify Design Process

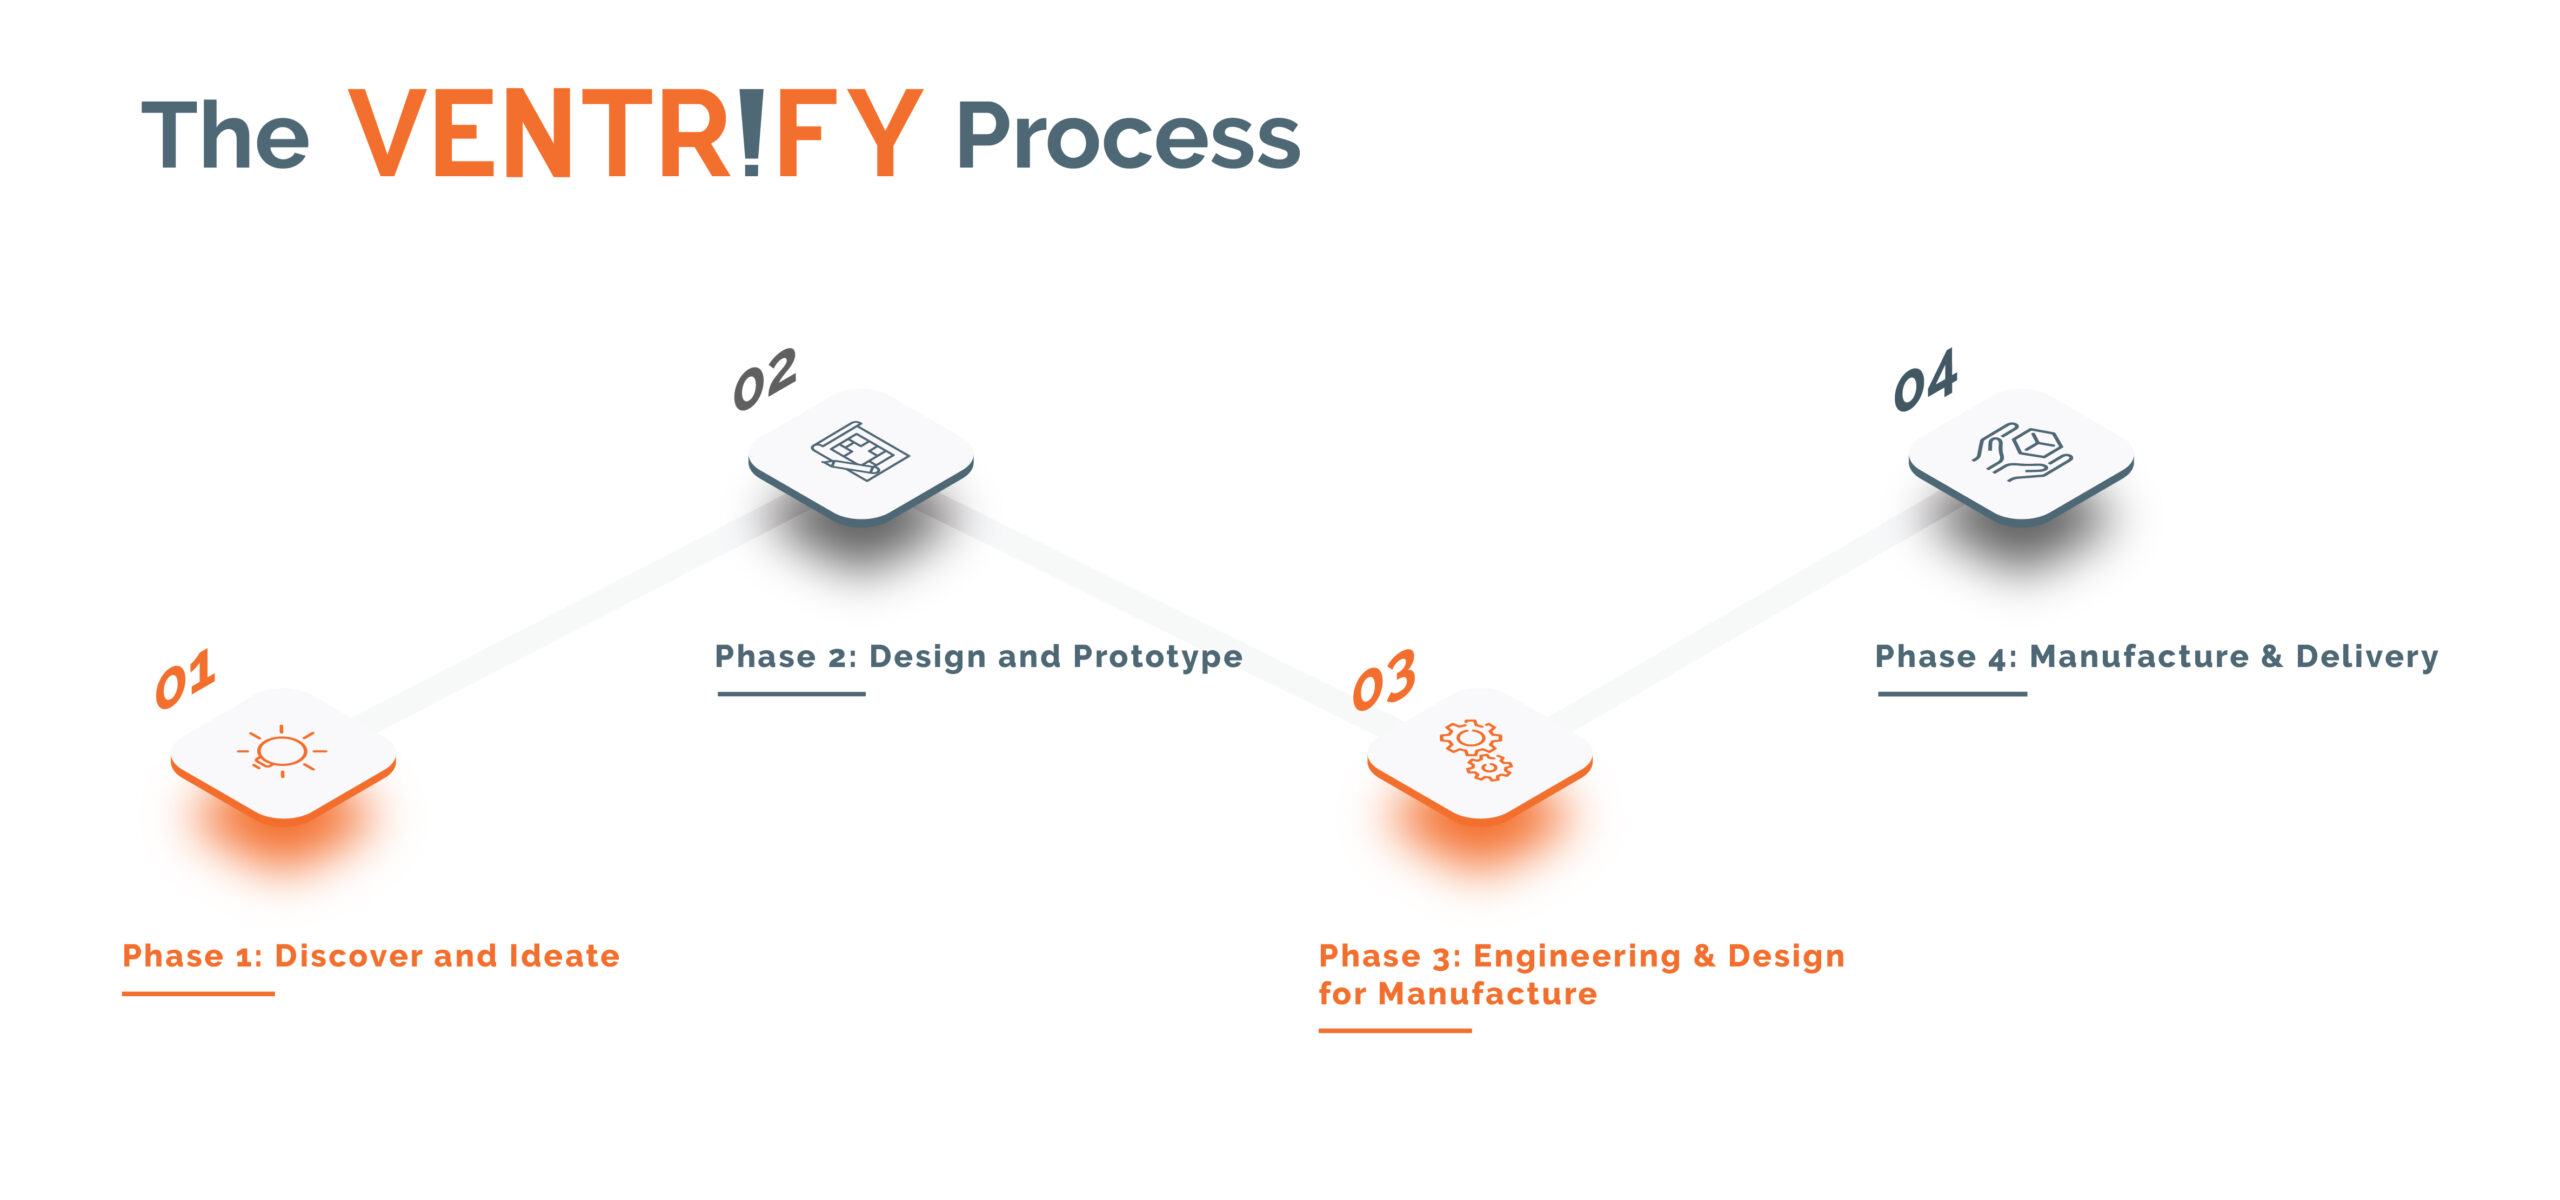
This is the process we have optimized at Ventrify over the last four years to bring concepts from idea to fulfillment ready product.

Phase 1: Discover and Ideate

In this stage, we understand the problem, ideate solutions and visualize them through industrial design sketches. Then we wrap them up by creating a product requirement document. This establishes the base on which the whole product is built. Phase 1 consists of 3 parts:

Understanding the end-user, their problem, and the greater market need.

You have to know your end users intimately. This is the person who uses your product for its intended purpose.

  • What are they doing?
  • Where are they doing it?
  • What do they value and what are they frustrated about?
  • What alternative solutions do they currently have?

We’ve found answering these questions, helps with answering many design questions later on.

Ideating solutions and visualizing with sketches

After doing the research and understanding the context, the whole Ventrify team comes together to discuss and ideate solutions to the problem. If there is an original concept, this is the time to consider it and evaluate it against alternatives – the good, the bad, its appeal, and how to make it better.

Then, we take the best ideas and combine them into a final product concept that we will bring to life through industrial design sketches or renders.

Building a product requirement document

With thorough research and a clear product concept, you can now effectively define success in measurable ways. We translate our research and visuals into measurable targets. These product requirements allow us to estimate the time and cost required for the remainder of the project.

The parameters defined, and not defined, are based on what is important to the end user and the client. Defining these requirements is key to overcoming a common pitfall of design – scope creep (more on that later).

As the product’s founder and head cheerleader, you will be tempted to add features as the development progresses. By putting together a product requirement document, you can focus on intentional defining success at the start, and prevent endless design changes.

Remember, the first version of a product will always have room for improvement. This is what future product versions are for. Having these parameters in place at this stage will help move the design forward and drastically decrease timelines.

Doing a thorough Phase 1 has a disproportionate influence on the product design cycle. Changes in later stages require significant rework, so doing this first phase well is how we’ve cut our design timelines by as much as 50%.

Phase 2: Design and Prototype

Phase 2 is all about making sure it will work – design, built, test, repeat. Let’s look at these 3 parts:

Conceptual design: analyzing & solving key design challenges.

Here, we define key design elements and address challenges individually prior to integrating them into the full design. We do this with complex mechanical systems, breaking them into smaller, more manageable sub-systems. If your product has electronic requirements, we break them down the same way.

By breaking them down into smaller sub-systems, the design challenges become more approachable and less daunting. This also makes it a lot easier to estimate the time needed to address each challenge.

Prototyping the mechanical and electronic systems.

At this stage, we translate the design into mechanical and electrical systems. We model these systems using appropriate design tools, then plan, source, and build prototypes.

Depending on the prototype, we often defer to 3D printing because it is so flexible. Quick note on 3D printers: although having a 3D printer is very affordable and it is extremely versatile, misbehaving printers can waste a lot of time, do your research before deciding to do this in-house.

For electronics, we build out the design with a breadboard or a raspberry pie to make sure it works before moving to something more compact and custom like a pcb (printed circuit board). If your product needs software to run, this can get complex quite quickly and software has its own development cycles. For this stage in prototype testing, we simply build a sample interface using a tool like Figma.

There are 2 types of prototypes, functional and aesthetics. Functional prototypes will do the intended function but maybe a different shape, size or look.  Aesthetic prototypes will look and feel like the product but won’t function properly or at all. Learn the ins and outs of prototypes at our blog, Prototyping in New Product Development Today.

Testing & Iterating

We test early prototypes quickly, iterating on changes as necessary and test them against key defined requirements from the product requirement document.

Most testing at the beginning can be done internally with the testing team or with friends and family. Since you’ve defined what your end users need, explain it to your testing team for context. Later on with higher fidelity prototypes, it is ideal to test with your end user.

When testing, watch how your product and its features are understood and used. Try not to make assumptions – instead, ask lots of questions, and try to understand the “why” behind what happens. Recordings help for later reference but be sure to ask permission.

If your prototype isn’t fully functional or the different parts of the system are not yet integrated, describe to them what would happen if they touch a button or pull a lever. Walk them through the functionality and try to get as much insight as possible.

Phase 2 is iterative within itself. This means the results in testing need to define the updates in the conceptual analysis, and the new prototypes should address previous issues.

Starting conceptual will help to iterate fast and not spend too much time on something that may not work. However, iterating fast allows you to narrow in on what works and get more detailed in addressing challenges and design concepts. Phase 2 is heavily influenced by the type of product you are working on, the systems in place, and the project requirements.

You know you’re ready to move to Phase 3 when all design features of the product have been set.

Phase 3: Engineer & Design for Manufacture

Phase 3 is all about getting the design production ready. This entails choosing a factory so that the manufacturing details can be determined.

Design for Manufacture and Assembly (DFMA)

This is the Design for Manufacturing Assembly (or DFMA) stage. Here we revisit the electronic and mechanical systems to optimize them for ease of manufacture, cost, reliability, and other product priorities. This means choosing the best manufacturing processes for your components and optimizing for that design process.

Once you have chosen a factory (you should have at this point), you should also work with them to accommodate their requirements as well as work with their in-house experts to implement any suggestions they may have (engineers at factories are often very specialized as they work in 1 environment for a long time and will have invaluable advice in that realm).

This step is also where you build your drawing package, export CAD files for the factory, and provide renders.

Manufacture Preparation

As you prepare to ship your product to do final testing and certification, it’s time to focus on the support material – product packaging and documentation packages.

For product packaging, consult with marketing as the “first impression” and “unboxing experience” can be very important but will depend on your market positioning and your distribution strategy.

Instruction manuals don’t always seem necessary, but can go a long way when limiting liability, targeting a less intuitive audience, and reducing the number of customer support emails you get. Remember, this doesn’t necessarily have to be printed, but make it visible and easily accessible.

Testing (and Certification if necessary)

Although calculations are great, you still need to make sure that the final product will withstand the theoretical design conditions.

This testing usually happens in highly controlled environments to ensure the design conditions are met. This can be done instead of, or in preparation for, certification. Certification is done by a variety of third-party labs and should be contacted early to gauge time and cost associated.

Learn more about the types of certifications your product may need at our blog, What Certifications are Needed for My Product?

Phase 3 also changes significantly based on the type of product and the requirements we have set out.

Phase 4: Production Management & Logistics

When you are done with Phase 3, you are ready to oversee production, ensure quality control, and manage the logistics.

Bonus: Find the best factory for your product needs

(Although this should be done during Phase 3, it fits better in this category).

Finding a factory involves searching and qualifying the best factories for your needs. There is no overall best factory, but there is one that is best suited for your project. Remember, your project will have specific priorities, whether it’s cost, quality, or time.  Also, the factory you choose should fit your order size (unit quantity) and allow for future growth.

Ideally, you want a factory that has created similar products – one that uses similar materials, similar processes and is of similar complexity. This allows you to gauge the quality of the work that the factory does and allows them to use their valuable experience for your project.

When searching for a manufacturing partner, consider talking to at least 20 different factories & narrow down to the best 2-3. The initial number of factories you will need to reach out to will be high because of the low response rate, so more is better to start.

At Ventrify, we look for factories all across the world. For high-volume manufacturing, China Vietnam, and Taiwan are the leaders. But with China’s strict Covid-19 restrictions and the rising cost of shipping, North American factories are getting more and more attractive. Again, everything comes down to your project priorities.

Walking through the factory prior to making the final decision will allow you to see typical working conditions. It is important to know that your product is coming from a safe and respectable working environment. We always have someone from our team visit the factory – it helps build trust with the factory and works as the basis of a strong relationship.

Overseeing production and ensuring quality control

During your manufacturing run, it is critical to have third-party quality control set up to ensure that any detailed requirements are carried out.

Most experienced factories will offer in-house quality control but there is no real incentive for them to find and address these issues (especially if it your first time working with them). Unfortunately, they can often overlook quality control issues. It is best to use them in addition to a third-party dedicated contractor.

Mismanaging production and quality control can mean wasting all the hard work you dedicated to the design, so don’t let your guard down just yet.

Logistics

Logistics refers to managing the vendor contracts, timelines, and payment for trucking from factory to port, export management, shipping (or air freight), import management, trucking from port to train station, train transport, and trucking from train to fulfillment center.

Because there are so many moving parts that need to be coordinated perfectly, we often work with a specialty logistics company to make sure this process goes as smoothly as possible.

As we come off the back-end off the Covid-19 pandemic, there are many horror stories surrounding supply chain management. As a result, there has been a big push to onshore production, but this move is highly dependent on the industry you are in and the product you are making. We recommend you do your own research on this topic before starting as it is constantly changing landscape.

That’s our process in a nutshell!

There is, of course, a lot that changes depending on the type of product, the complexity, and the requirements of every specific project. But before you dive into developing your own product, read about our biggest stumbling blocks from the early days:

What didn’t work: the evolution of our process, what we tried before and why it didn’t work (our mistakes)

Staying aware of these before starting the project will help you avoid expensive mistakes and long delays.

Unclear Scope (aka scope creep)

Scope creep is a common beast.

Whether it’s out of excitement, a desire to make your product better, a bit of perfectionism, or just a lot of feedback you want to implement, there are always reasons and opportunities to increase the scope of a project.


Sometimes, it is warranted, but often, an unclear scope leads to scope creep. Having a well defined scope (read: have a good product requirement document) can go a long way to keeping you on track. This plays a huge factor in both time and cost.

Not Planning Ahead

It sounds silly now, but in our early years of product design, we split every part of the product design process into each own step (9 steps at one point) and did them consecutively. That didn’t work for many reasons, but one of the consequences was that it was easy to focus on work at hand.


We justified it by saying it would improve focus, decrease task switching, and result in more progress. But it only took one time signing up for a certification lab and being put into a 3 month que before we changed that.

Plan ahead.

Planning for every detail

After not planning enough, we over-corrected and began to forecast the whole project from the start. It was part of an initiative to help with quoting lump sum projects.

But the nature of the design process is it is unpredictable. Change happens. Testing never goes as planned. There is almost no way to forecast how many design iterations you will end up doing. You have to stay nimble.


We’ve found that a product requirement document strikes a strong balance – it helps define the end goal, but allows us to be flexible in getting there. We’ve also moved away from lump sum projects for this reason.

Summary

Product development is broad and complex, but for hardgoods and consumer electronics built on a budget, the Ventrify Design Process is a guide to an efficient and methodical product launch.

Trust the process, avoid our mistakes, and make something great. Good luck!

If you enjoyed this article, you might also enjoy our other insights: https://ventrify.ca/blog/

About the Author

Ventrify is a product design and manufacturing firm that helps entrepreneurs bring product ideas from concept to market. We take in fledgling ideas and bring them through our iterative design process to create products our clients can be proud of. Then, we work with manufacturing facilities worldwide to bring our clients the highest quality products at competitive prices.

If you have questions about the Ventrify Design Process or need help with your product design, reach out to us through our Website, Facebook, or LinkedIn.

Prototyping is a sexy word that gets thrown around a lot in product development circles, so what is it and what’s the big deal? Well, the topic of product development is broad, and so is prototyping. In fact, prototyping is a part of almost every aspect of the product development process in one way or another. 

At different stages of the product development process, there are different types… of prototypes. They are used for a variety of reasons, but generally, they are made to test some aspect of your design.

Here’s what we’ll cover in our discussion about prototypes today:

Let’s dive in! 

And keep in mind – some aspects of our discussion may be relevant to software and commercial applications, but this article is focused on prototyping in the consumer product space.

What is a prototype?

A prototype is an early version of a product built to test some aspect of the design. They are often incomplete in some way, sometimes more and sometimes less expensive than the end-product, may not function, can be a different shape and size, or be down right different. 

Ultimately, prototyping brings a concept idea to reality, it provides a window to study a certain aspect of the theoretical design, in real life.

“Design” is a very broad subject – what part of “design” you ask? Well, for different aspects of design, prototypes do different things, and that’s what we’ll look into next. 

What is the purpose of a prototype?


So now we know that the purpose of a prototype is to evaluate some aspect of a design. That’s very generic – yes – that’s because it is a broad category. Throughout the product development process, prototypes are used for different purposes. Let’s look at a few different reasons for creating a prototype:

Proof of Concept

A proof of concept prototype provides proof that a design, or a specific part of a design, is feasible. It’s often easy to come up with an idea or mechanism, but working out the functionality is often a lot harder. 

A proof of concept de-risks the product development process by addressing the most (or one of the most) challenging parts of the design early. It uses the assumption, if the hardest part can be proven, the rest can be figured out down the line. 

For highly technical products, proving a concept is a huge milestone and one that outside investors love to see (at the pre-seed or seed stage).

Idea Visualization or Communication

Sometimes, the purpose of a prototype is to effectively convey your idea to someone. The  prototype translates a concept into something tangible, something unmistakable. Clients, managers, and team members can obtain clarity on the subject with a prototype.

In some cases, industrial design sketches or 3D models can help visualize a message, but often, a prototype is needed. In the automotive industry, new car designs are formed from clay to help communicate the shape, size, and features of the car. Models and sketches simply cannot convey the design. 

This category of prototypes will likely see a decrease in prominence with the improvement and  adoption of virtual and augmented reality.

Discover product opportunities

Testing your prototypes also helps you discover features that your target audiences love and care about. Often done earlier on in the product development process, testers will help pinpoint the most important features of a product, helping you prioritize your product design efforts.

Asking testers about features they would want also gives valuable insights into what features your target market may like, which can lead to additional features, another version of your product, or even a pivot (changing the main product significantly to address a different opportunity).

Design review & feedback throughout development

In the past prototypes were expensive and, as such, were invested in during later stages of product development. Now, with additive manufacturing technologies (like 3d printing) as cheap and versatile as they are, prototypes have been integrated into the earliest stages of design. 

These prototypes allow you to bring the theoretical concept to reality, which allows you to gather feedback, refine goals, and make decisions.

At early stages, this can mean testing something as simple as the size, shape, or weight of your concept. At later stages, this can mean testing assembly fit and interference, mechanical requirements, or color and texture finishes.

Reduce risk in the product launch 

Testing a prototype helps you identify parts of your product that customers love, and parts of your product that customers don’t understand, dislike, or don’t feel strongly about.

This allows you to focus on the best parts of the design, address issues and remove unnecessary features. Ultimately, this allows you to build confidence in the product and de-risk the final product launch.

Functional Prototypes vs Aesthetic Prototypes


Prototypes are often characterized as functional or aesthetic. Sometimes a prototype is both, but that is typically very late into the product development process (such as the marketing samples, or the golden sample – the standard used for the production runs). Throughout the product development process, the functionality is (typically) addressed separately from the aesthetics. 

Functional Prototypes

A functional prototype is a sample of the full or a part of the product that functions as the design is intended to. Because these prototypes are used to verify functionality, they do not focus on aesthetics and usually won’t look like the final version (shape, size, color, UI, etc). 

Functional prototypes are usually low fidelity in the early stages of development (proof of concept) and high fidelity towards the later stages (for engineering analysis, certification, etc). Up until the later stages of development, functional prototypes use low-volume, easy-to-configure components that will simulate the functionality of the end product, but at a much higher cost and larger form factor.

Functional prototypes help de-risk the product and are instrumental in having confidence in the product functionality.

Aesthetic Prototypes

In today’s competitive markets, products nowadays need to be more than just functional. It is now crucial that your product also evokes a positive response from your customers. 

The goal of an aesthetic prototype is to provide you with a physical sample of how the product will look and feel. This is addressed by the industrial design of a product – which focuses on the human-product interaction. 

Aesthetic prototypes are usually prioritized later on in the development process once functionality is addressed, this means they are often higher fidelity. Note, the opposite is true for brands that prioritize design – they focus on aesthetics first, then address functionality later. 

The development of an aesthetic prototype puts an emphasis on the look, feel, and styling of your product. This means size and shape, but also colors, textures, curvatures, firmness, materials, and more.

Low Fidelity vs High Fidelity Prototypes


Fidelity of a prototype refers to the grade of the quality and is typically dependent on a product’s progress in the development process. 

Low fidelity prototypes

At the earlier stages, products are typically low fidelity and relatively cheap (think $10-$1000). 

Low-fidelity prototypes are common during conceptual design, like a proof of concept, and to help convey ideas and functionality.

This type of prototype helps to make changes easily and quickly. It focuses more on functionality  and allows designers to get feedback early in the design process. 

As the product gets closer and closer to market readiness, the resulting prototypes will have higher and higher fidelity – and will increase in cost accordingly. 

High fidelity prototypes

High-fidelity prototypes start to look like the end-product and are often made at the factory where the production will later take place. 

These prototypes are often used to help decide on the finer details of a design. Because they are often very similar to the end product, they are also used for product certification, gathering testimonials, and creating marketing collateral (professional photography, videography etc.).

In summary: prototype early, prototype often

Successful products do not happen by accident. They are a result of a rigorous design process, which includes the building and testing of prototypes. Remember, prototypes are part of an iterative design process and are meant for testing and learning, so use them early and use them often.

If you have enjoyed this article, check out our insights on testing: Your Complete Guide to Product Testing.

About the Author

Ventrify is a product design and manufacturing firm that helps entrepreneurs bring product ideas from concept to market. We take in fledgling ideas and bring them through our iterative design process to create products our clients can be proud of. Then, we work with manufacturing facilities worldwide to bring our clients the highest quality products at competitive prices.

If you have questions about prototyping in the product development process or need help with your prototype, reach out to us through our Website, Facebook, or LinkedIn.
It happened – you had a light bulb moment – a product idea you know will be big – but how much will it cost to develop? The truth is, it depends on so many factors, it’s hard to say. But in this blog, we will look at the costs associated with developing a specific type of product – a physical, consumer product, made for mass production.

Although this is still an extremely broad category, we will take a look at the typical costs of each step in the product development process. We will dive into what determines the cost and why it varies depending on the type of product. Broadly speaking, the cost of product development will be from $60,000 to $175,000 and that can swing both high and low depending on who you hire, what you do yourself, the complexity of the project, and countless of other considerations.

Why so much? Well, there’s more to product development than meets the eye, and that’s what we’ll dig into today.

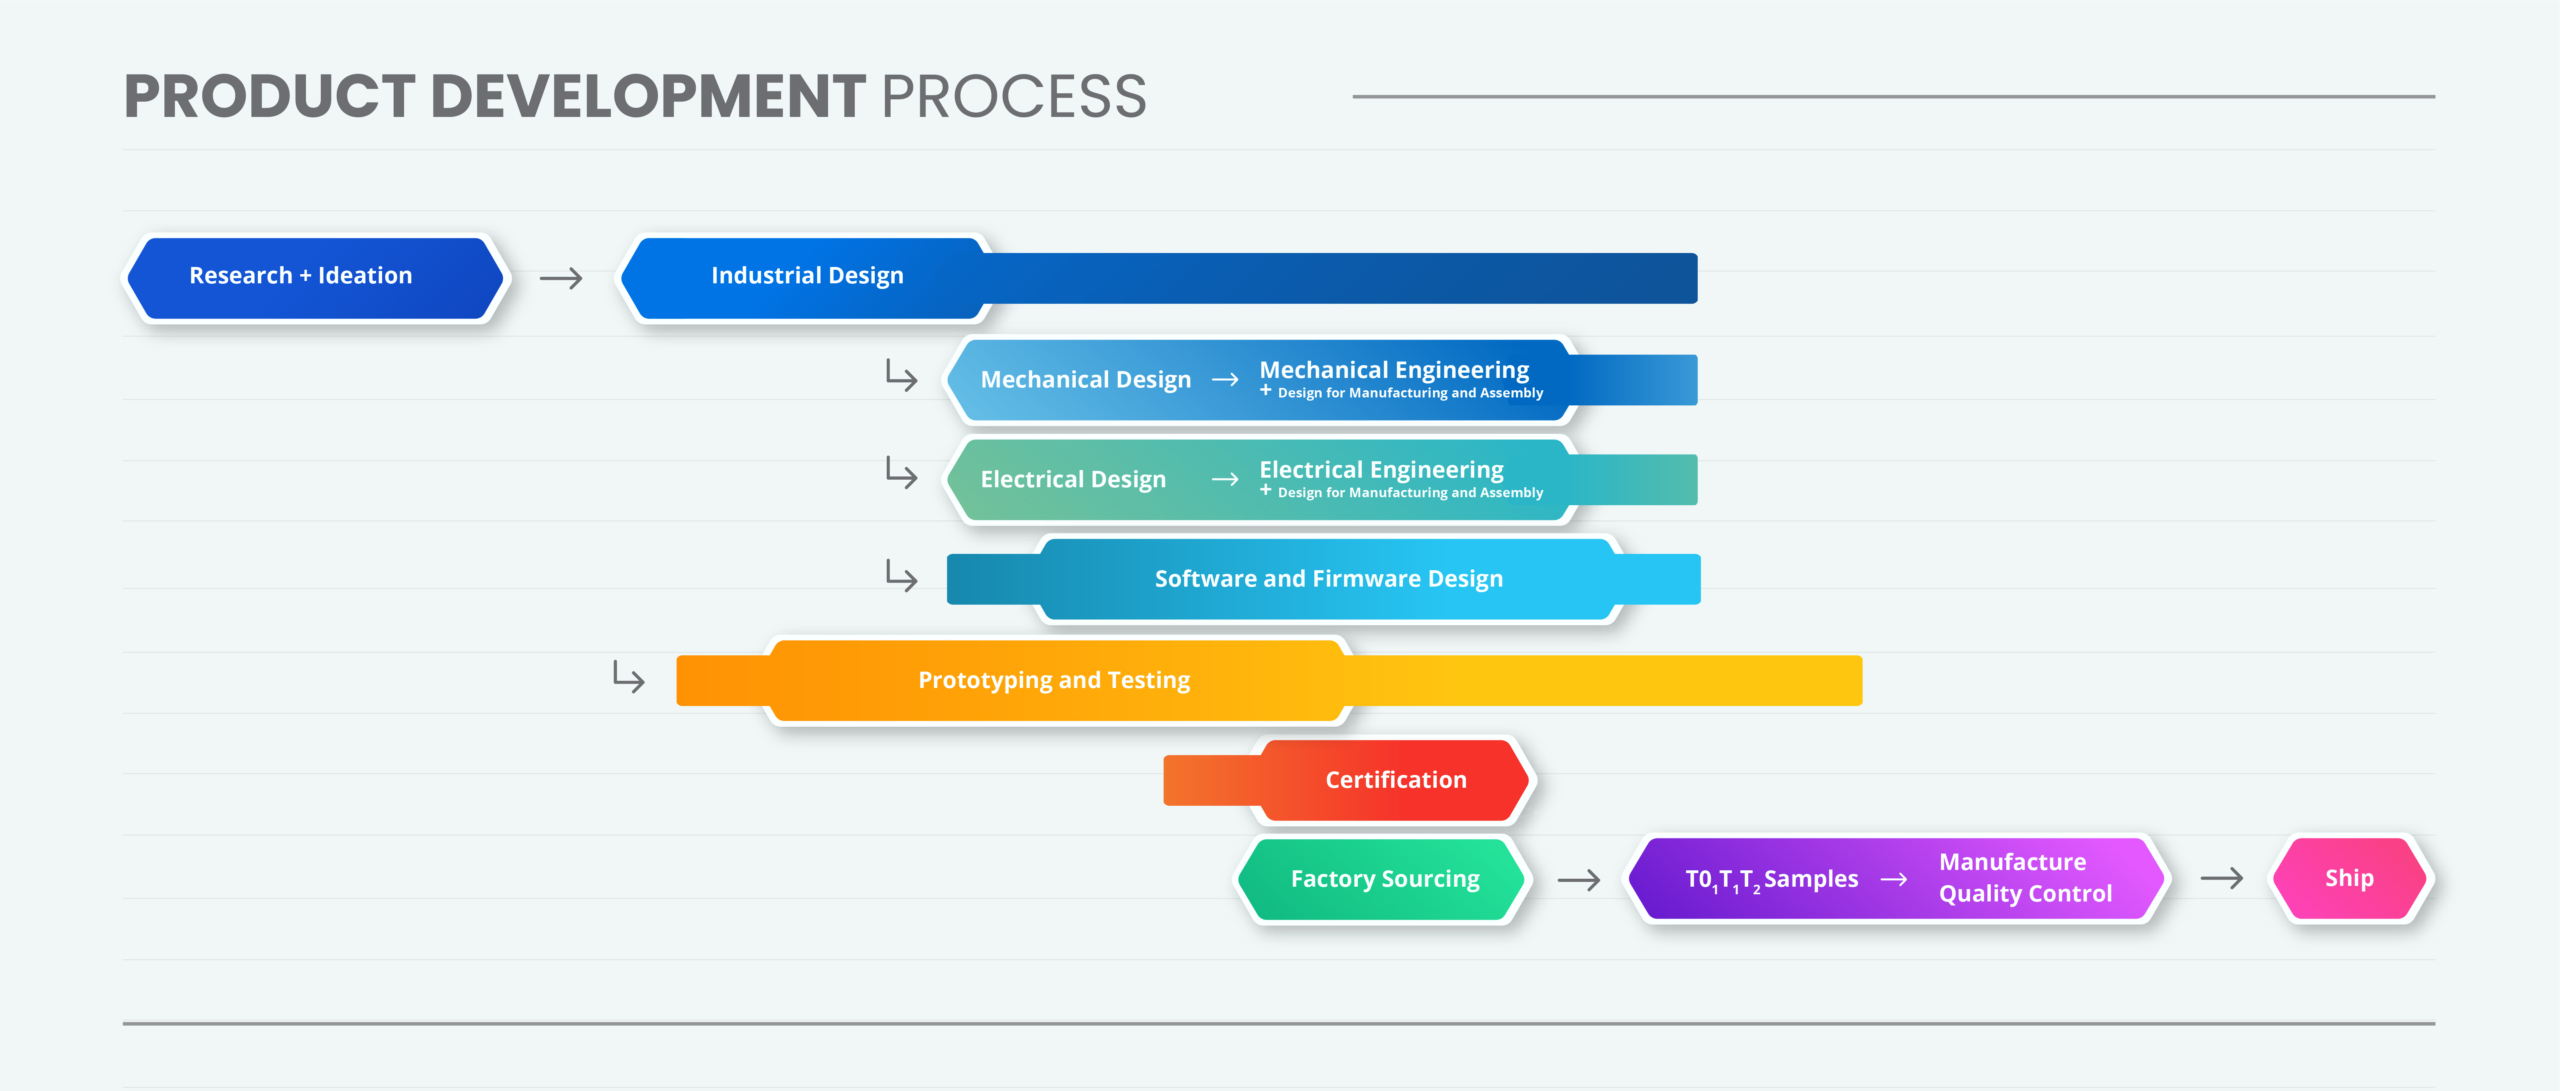
Ventrify product development process

Let’s explore each of these potential costs and the factors that influence each cost:


There are also many soft costs, like finding and qualifying contractors, managing communications, timeline delays, etc., but today, we will focus on the more concrete aspects of the product development process. 

Let’s dive in:

Why it’s important to understand product development costs before jumping in

There are many steps to the product development process, and each costs money – but not every step applies to every product in the same way. 

Whether this is your first venture to creating a new product for the market, or you are a serial creator that has launched several products, knowing how much it would cost to develop your product is vital. 

If you start blind, you may run out of funding before your product ever launches, disappoint investors, or show your naivety to strategic partners. In this article, we hope to give you insight into the process so you can start from a place of knowledge.

The Cost of Research and Ideation

[Cost: $2,500 – $5,000]

In planning to launch a new product, the first step is to understand the problem, and how you solve that problem. You want to see how big the problem really is and the greater market opportunity. There are many ways to do this, but the goal is to come up with a product concept with functional elements that serve as a foundation for product development. 

With Research, a holistic and objective perspective of the problem is reached. This is often necessary because the founder of a business is intimately attached to the problem, and doesn’t always experience the problem the same way as everyone else. Although the founder is the one to finds the problem and often the solution, the product design process requires you understand these 2 things objectively so that they can be built not for the founder, but for the greater market need. 

A product requirement document is often built at this stage to define what, exactly, is needed to define success. This works to mitigate scope creep throughout the design process.

Ideation (or idea formation) is the creative process of coming up with of potential ideas and solutions to the problems. There are many ways to go through this process, but generally, the outcome is a set of potential solutions to the problem or problems presented. The solutions can address a specific problem or all the problems. The chosen design is often some combination of multiple ideas. 

What Determines the Cost of Research and Ideation?

It is very difficult to narrow down Research and Ideation as it is highly variable for different products. A few items that affect this range are:

  • complexity of problem and solution
  • background knowledge on the subject area
  • what level of detail you are looking for

The Cost of Industrial Design

[Estimate: $2,500 – $10,000]

Industrial Design addresses how the product will look and feel in the product-human interaction, which determines who this product will sell to on the market. 

Industrial Design considers every aspect of the product from appearance to functionality with the goal of creating a design that resonates with the customer and is intuitive to use. If you have ever picked up a product and it simply “made sense,” without reading the instructions, that is good industrial design.

This work is front heavy with sketching and modeling the product concept – “bringing the concept to life.” However, industrial design is important throughout the whole development process to ensure the design does not change or deviate heavily from the original solution. This is often a challenge during the later stages of development as the initial design must adapt to the functionality, reliability, and manufacturability of the engineering and production stages.

What Determines the Cost of Industrial Design?

This depends on how important design is for your product – many products will focus on function, while others will look to distinguish themselves through market positioning. Sometimes, you can adopt an existing product design that works just fine, but for novel products, this is often not the case. Considerations for this cost will include:

  • the importance and value you put on the industrial design
  • complexity of product
  • number of use cases you are considering for the product
  • whether designers and founder align on design and vision

The Cost of Technical Design

[Estimate: $15,000 – $30,000]

Technical design breaks down the ideas in the industrial design stage into feasible mechanical, electronic, and software systems. These systems are created using low volume, prototype-style design tools as a proof of concept. These designs are then iterated on to solve subsequent design challenges.

The purpose of this step is to make sure the functionality (or the aesthetic) of a product concept is feasible. 

The technical design step happens in cycles with prototyping and testing. Systems are designed, prototyped, and tested. These cycles are repeated to address and overcome design challenges as well as roadblocks that come up throughout the design process.

Technical Design Cost Factors

Depending on the nature of the product, this stage can be extensive or relatively short. Complex projects will require many design iterations, while some products may be purely mechanical and can completely skip the electrical and firmware/software side of things.

It is difficult to estimate the time and cost associated with this stage and it is iterative and new challenges will often arise throughout the design process.

The Cost of Prototyping

[Estimate: $5,000 – $10,000]

Prototyping is about building a design so it can be tested. 

Early on, this happens as part of the technical design cycle (design, prototype, test) where you are able to validate feasibility and address big risks. Later on, this happens as part of the engineering design cycle (engineer, prototype, test) where you validate engineering analysis, reliability concerns, and other more nuanced aspects of the design.

With the emergency of additive manufacturing (mainly 3d printers), prototyping has moved into earlier and earlier stages of the product development process, getting cheaper and cheaper. Learn more in our article, Prototyping in Product Development Today.

Factors Affecting Prototyping Costs

Prototyping starts at the early stages and ends in the late stages of the development process. It can be very cheap and quick for low fidelity functional prototypes and very expensive for high fidelity functional and aesthetic prototypes.

In general costs are also affected by

  • Complexity of the prototype (number of parts, tolerances, mechanical integrity, etc.)
  • Fidelity of the prototype
  • Method of manufacture, materials, etc.

The Cost of Testing

[Estimate: $5,000 – $10,000]

Testing happens throughout the product development process. It happens in conjunction with prototyping as part of the design iterations. 

Testing allows the design team to gather feedback on your designs. It helps the team to identify potential issues or validate product decisions. Testing also allows you to de-risk the product launch: by testing throughout the development of the product, the design team has constant feedback on what works and what doesn’t. 

Product requirements should be clearly defined at this stage so that a prototype may be effectively evaluated on whether its performance is acceptable or not. Learn more in our article, Your Complete Guide to Product Testing.

Factors Affecting Testing Costs

Product testing costs vary depending on the product concept being tested:

  • Riskier projects may require more testing and iterations to improve confidence and reduce risk
  • If multiple product concepts are to be pursued, this will mean testing multiple concepts in parallel
  • The less uncertainty you are willing to put up within the product testing outcomes, the more thorough your testing needs to be and the more it will cost
  • Specific tests will require specific equipment

The Cost of Engineering

[Estimate: $25,000 – $50,000]

As the product goes through more and more detailed testing and refinements, engineering analysis is done to prepare for reliability, production, and regulatory requirements.  Mechanical, electrical, software and firmware systems are optimized for cost, durability, efficiency, and other product requirements.

The focus at this stage is on getting the product design ready for mass production. 

The product design is engineered to meet the initial specifications. Design requirements are reviewed, and analysis performed. Testing is carried out to validate calculations and ensure certification testing will succeed.

A lot of finer details are taken care of at this stage such as creating the quality control requirements, building the instruction manuals, and setting up for certification.

Cost Factors Affecting Product Engineering

  • Number of parts and assemblies
  • Safety devices, medical devices, 
  • High intensity environmental conditions
  • Electrical and firmware/software systems
  • External device integration
  • Rare or complex materials and manufacturing processes
  • High performance equipment
  • Products requiring electrical hardware and software/firmware integration may cost more to create than the simpler ones

The Cost of Certification

[Estimate: $5,000 – $10,000]

Once the product prototype passes through internal testing to ensure that it is safe, reliable, and can meet its desired product specifications, it then needs to go through 3rd party product testing for certification, before it can proceed to mass production.

Product certification cost and timeframe is based on which certifications you choose to get and where you choose to get them.

Product certification is the process by which your product is tested to meet regulatory standards in a specific market or industry. For example, if you were selling a medical device, a safety device, or a wireless device, you would need to certify your product before selling it to consumers.

Types of product certifications can include:

  • FCC certification, for all electrical products sold in the United States, although this certification is significantly more expensive for wireless products.
  • UL certification or CSA certification, for any electrical product sold in the United States and/or Canada that plugs into an electrical outlet.
  • CE certification, for most electronics sold in the European Union. This certification is like the FCC and UL certifications required in the United States.
  • RoHS certification ensures that the product is free of lead and is required for products sold in the European Union or California.

Learn more about what certifications you need for your product at our blog: What Certifications are Needed for My product.

The Cost of Factory Sourcing and Set-up

[Estimate: $2,500 – $50,000]

Setting up for mass production can be a significant expense when developing a new product. This stage includes finding and qualifying the best manufacturing partner(s) for your product. Then, negotiating contracts (costs, timelines, quality control procedures, etc.)  and setting up the production tooling.

After the final engineering design is complete, the final prototype (sometimes called the Golden Prototype) for production is prepared. The final drawing packages as well as this golden prototype will be used to set up production tooling and run t0, t1, and t2 samples. These samples are the first units created by the mass production tooling and allow you to refine how the end product will turn out. 

Factors Affecting the Cost of Factory Sourcing and Set-up

There’s a lot that can define the cost of this step. 

  • The manufacturing process used (plastic molds are often the big cost at this stage)
  • The complexity of your product and whether you will need to coordinate multiple factories or just one
  • How specific you are with cost
  • The production run quantities you will be making (and minimum order quantities)
  • If the factory has made a similar product or if they have similar capabilities (vs making tooling from scratch)
  • Manufacturing process used (is it manual, highly automated, how long it takes, etc.)
  • Availability of materials 

Learn more in our related articles, A Beginner’s Guide to Incoterms and The Price of Mass Producing Plastic Products.

The Cost of Manufacturing Quality Control

[Estimate: 0.5-2% of production cost. Often about $500 – $1,000 on a first order.]

Ensuring the quality of the product is absolutely essential. Quality control happens throughout the manufacturing process at the component level, the assembly level, and the final package level. 

In the engineering stage, you will have identified a number of likely issues that need to be monitored in a quality defect document. You will work with the factory to roll out quality control checks throughout production line; however, it is important to also have a third party quality control partner to ensure this is done properly.

By checking often and throughout the process, you are able to find and address issues early on, saving considerable time and money.

Cost Factors Affecting Manufacturing QA

The cost of manufacturing quality control is affected by the scale of your order and the acceptable quality limit (AQL) you’ve chosen for your product. Learn more about acceptable quality limits at this article by QualityInspection.org.

Bonus: The Cost of Shipping

Although this article is focused on the product development costs, we will leave this here as an honorable mention as it is a significant cost. (Please note, this list also excludes the cost of the factory production order itself).

[Estimate: $1,500 – $25,000 (pre-pandemic to mid-pandemic for a 40’ container – China to North America)]

After production, it is important to ensure that your product gets to its destination safely.  There are different ways to transport your product – if manufacturing in China, the two options are sea freight or air freight. Although this is the major differentiator, this stage refers to transportation from factory to fulfillment center. 

This includes trucking from factory to port, export management, import management, trucking from port to train station, train transport, and trucking from train to fulfillment center. This is commonly referred to logistics, because there are many moving parts that need to be coordinated to execute this efficiently.

Factors Affecting the Costs of Shipping and Logistics

Air freight is a good option for small, low weight, high value products or when time is critical, but we will focus on sea freight as that is the more common path. The quantity of your order will determine the size and number of shipping containers you will use, but there are many nuances to this cost. 

  • The size of your package determines how many units will fit in a container and the corresponding cost/unit.
  • Location of factory with respect to the port
  • Palletizing your product (fit less product, pay for pallets, pay for forklift)
  • Not palletizing your product (fit more product, pay more for manual loading and unloading, unloading delays and storage)
  • Whether your shipping route is well travelled (lower cost, higher chance of delays)
  • The type of product you are shipping (export and import duties)
  • Additional shipping services like tracking and insurance

Estimate the cost of your freight with this FreightOS calculator

Estimate the cost of import duties with this FreightOS calculator.

When diving deep, don’t trust the calculator, look for yourself using this US government database

Conclusion

As you now know, product development is a complex process that is different for every project.

There are many steps and costs associated with the product development process. A ball park range for consumer products made for mass manufacture is $75,000 – $100,000 for professional, relatively simple product designs, plus extra for production and logistics.

However, these projects can quickly run over budget because from design issues, scope creep, and improper planning. Product development requires a great deal of communication and timeline management which is why full service product design firms are so convenient.

If you want to know more about product development and how to bring your product from concept to market, learn more about The Ventrify Design Process Here or check out our other insights.

About the Author

Ventrify is a product design and manufacturing firm that helps entrepreneurs bring product ideas from concept to market. We take in fledgling ideas and bring them through our iterative design process to create products our clients can be proud of. Then, we work with manufacturing facilities worldwide to bring our clients the highest quality products at competitive prices.

If you have questions about estimating the cost of your product development or need help, reach out to us through our Website, Facebook, or LinkedIn.
Learn from other people’s mistakes

Whether you are thinking about building a product or planning your product launch, you should keep product testing in mind.  Here are some statistics to consider:

  • More than 30,000 new consumer products are launched each year and 95% of them fail (Harvard Business School)
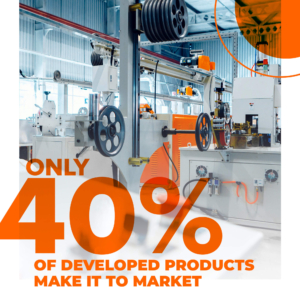
  • Only 40% of developed products make it to market, and only 60% of that figure will make revenue (the Marketing Research Association)
  • 63% of survey respondents said they like it when manufacturers offer new products (NIelsen).
  • Only 11% of new product consumers remain engaged after 52 weeks (Catalina). 
  • 57% of survey participants reported they purchased a new product during their last grocery shopping trip (Nielsen)
  • 27% of consumers reported that they wished more products could make their life easier. (Nielsen)

Although there is no precise data to show how many products failed because of design flaws, failure to understand consumer needs, or failure to launch, we believe that launching new products requires more than just designing a product to fit a market need.

Successful product launches are a result of excellent product development strategies that involve, among others, rigorous product testing.

So what is product testing anyway?

Product testing is a method used to evaluate a product concept: the product’s properties or qualities, its features, overall performance, or how potential customers may use or react to  a product

It is important for a company to perform product testing throughout the product development process. The company may do it at any step, from the ideation to development and even during manufacturing. 

In developing a new product, it is crucial to start testing early with a minimum viable product  – to test every prototype for its function, aesthetics, or user experience. It is also critical that testing be done by the right people throughout the development stage. 

Product testing can be done by the designer,  manufacturer, or independent laboratory.  There are many standardized test methods, but the test itself often varies to fit each individual product.

Whether it is screening concepts, validating suitability for the intended product use,  ensuring design safety, or solving manufacturing problems, companies use product testing to solve problems proactively and make for a smoother product launch experience.

We’ll be diving deep today into each aspect of product testing. If you’re looking for something in particular, jump there directly. This is what we will cover today:


Let’s dive in.

What does product testing entail?

The testing process usually starts with a problem that needs a solution, or a question about a product that needs to be answered. Will changing the packaging of a food product prolong its shelf life and attract new users? Will upgrading the camera feature of a mobile device encourage current users to upgrade to this new model? 

Product testing may occur in various stages throughout the development process. While testing may vary from project to project, there are some common types that may be similar across various industries.

1. Concept Testing

Concept testing involves asking customers questions about your product concepts and ideas prior to development. It explores the feasibility of a product idea or concept and evaluates the customers’ acceptance and response to it.  

The primary purpose of concept testing is to see if customers like your product idea and to gauge whether they will actually buy it. 

Depending on the type of product, concept testing often includes defining the goal of the testing, choosing the sample population, deciding upon a survey format, communicating the concept, measuring consumer response, and interpreting the results. 

Many big brands invest a lot in market research and concept testing because it is necessary for building and maintaining great relationships with customers.  And it is also crucial to developing successful and profitable brand.

2. Testing Design Conditions

Similar to mechanical testing, which helps you understand the mechanical properties of a material or a response to a given action, testing design conditions helps you understand the properties of your whole product or a sub-assembly. The aim is to find out whether a product will perform as it was designed to. 

Here are some ways of testing design conditions:

Stress Testing

Stress testing is a type of material testing done on a product to see how it will react under design conditions.  The goal is to test your product’s strength to ensure it can withstand the forces it will be subjected to. A test scenario is created to simulate an extreme design condition. The test scenario is repeated to confirm that the theoretical analysis behind the design and the integrity of the assembly. 

Impact Testing

Impact tests are done on a product to know how it will behave when subjected to high loads for short periods of time.  A common scenario is a drop test.

Cyclical Loading

Cyclical tests are done on a product to know how it will behave when subjected to repeated loading over time.  This is often done for sports equipment (think snowboard bindings).

Environment Testing

Environmental testing simulates the different environmental conditions, mechanical stress, and material stress that products are exposed to during their lifetime. It shows how a product will survive and continue to operate as designed while being subjected to environmental conditions during storage, transportation, or end use.

Depending on the product, environmental testing can include:

  • Climatic testing (temperature, water and humidity, altitude, Icing, etc)
  • Mechanical testing (vibration, sand and dust, flammability)
  • Materials testing (Salt fog and cyclic corrosion, UV and weathering, Chemical and fungus resistance, Fluid and groundwater immersion)

Exposing the product to the harshest conditions allows you to analyze risk and breaking points. Knowing this information will guide the development team to further.

3. User Testing

User testing, or usability testing, is the stage in the design process that exposes your product to real users and evaluates it to create human-centric products.

The goal of user testing is to detect product usability issues, with the aim of improving the overall user experience. High fidelity user testing comes after the development team has built an aesthetic prototype, at the later stages of development. The product is then exposed to representative users to monitor how they interact with the product in a realistic setting. This way, you can see exactly what works, if the product is easy to understand and use, and what unforeseen challenges your users face.

The data gathered from this test reveals the customers’ experiences with the product and serve as a basis for last-minute design changes (if issues are significant) or possible future product iterations.

A/B Testing

A/B Testing is a type of User Testing where two versions of a product feature are exposed to customers to determine which version they prefer and to show which product will most likely perform better in the market. A/B testing can aid entrepreneurs to develop products that will resonate most with users.

With A/B testing, teams can create apples-to-apples comparisons of a single product variant, to ensure their results reflect how actual users respond specifically to that variant.

A/B testing is often done by presenting two variations of a product to test subjects, and it can be done much earlier in the design cycle by describing the specific features verbally or with imperfect prototypes to gather valuable feedback.

4. Quality Control Testing

Quality control (QC) testing is a process to ensure that your product is of the highest possible quality for your customers. QC employs techniques to prevent issues with your product and to ensure an excellent user experience for your customers.

The aim of QC testing is to make certain that a product works and looks as expected and helps the development team identify problems during production, before shipping and launching.

Depending on the type of product, a lot of testing needs to be included in the production set-up.  In the case of mass production, there are usually tooling samples (T0/T1/T2 samples), the first products made coming from the mass production tooling.  Testing these may require a simple visual inspection, and in some cases, more thorough testing.

If you’re interested to learn more about mass production, check out our blog on The Price of Mass Producing Plastic Products.

Bonus: Market Testing 

Market Testing is a  process that businesses employ to evaluate the viability of their new products prior to releasing them in scale.

To assess its viability, market testing involves introducing a product to a test market, a defined set of customers (the ideal client aka client persona or avatar). The test market can be based on a specific segment, like demographics (female, age 25 to 45), or geographic areas. The test is generally done without the customer’s knowledge to acquire non-biased feedback on the product.

The goal of market testing is to evaluate the potential success of the product in the desired market. Market testing is done for a variety of reasons at different stages of a company’s growth. In early stage product design, market testing allows you to gather valuable feedback on the size of the market and even presales.

This is usually done by the marketing or founding team, a separate topic that we will discuss in another blog.

When should product testing be done?

Generally, product testing should be done throughout the entirety of the product development process.

The most successful products are tested regularly to demonstrate from proof of concept all the way to final product. By doing this, a product gets properly defined and refined as it goes through product development. This is to ensure that there will be no surprises once a product is finally launched.

Why is it important?

Here are the top reasons why product testing is important for anyone designing a product:

Catch product problems at the onset

With inadequate testing, some problems with new products surface only after they are sold, resulting in costly penalties or product recall. Product testing help to avoid costly errors by ensuring that only the right product gets to the market.

Better user experience

Product testing can help ensure that consumers understand what your products will do for them, and which products offer them the best value. It gives an insight into what the user likes and does not like about the product. One of the biggest pitfalls is the failure to properly communicate the purpose of the product to the end-users.

Fit for end use.

Product testing helps validate the suitability of your product to the end user.  Satisfied end-users become raving fans and customers of your product, encourage repeat purchases and attract new customers and users.  

Ensure product reliability and QA

Product testing ensures that the product performs as designed, consistently, and reliably. It is also crucial to in complying with regulatory requirements for products that operate in critical environments or undergo severe stresses.

Validate your product marketing claim

When launching a new product, it is best to check the claims made during marketing campaigns. Product testing, especially those that give out certifications, provide credibility and build trust for your product with your market. 

Maximize the product development cost

The cost of developing or redeveloping products can be huge. Sometimes, manufacturers add features that customers do not value or do product tweaks that make little difference to the bottom line. 

Product testing at the start of the product development process can ensure that every cost of research and development adds value to the final product, and prevent unnecessary costs.  It can help gain confidence and de-risk the product development process.

Decreased Product Development Time

Testing can minimize time to market by catching flaws early on. This saves the firm from going back to an initial phase to look for and correct a design or manufacturing process mistake. The findings of product tests can also be used to inform work on the product in subsequent phases of development.

Reduce production costs

Companies use testing to refine their designs and production processes to cut production costs. Detecting problems early in the product development cycle lowers the cost of correcting such problems. Testing a product for quality before releasing it to the market can save companies money on refund, returns, legal fees, and ongoing support.

Challenges of Product Testing

Depending on the product and its intended use, testing challenges can range from simple to complex. Some of the more common ones we encounter:

Understanding the Product Requirements

Product requirements are the information that drives product testing. Often, the requirements are ambiguous, missing, and often incomplete.

Some questions to help address the challenges in understanding product requirements, provide the direction on how to define each feature, the estimated cost, and how requirements are prioritized.

Deciding on Cost vs. Risk

A manufacturer may choose to test every single feature of a product to balance safety and liability, but this process can be time and cost-prohibitive. Instead, the most rigorous testing is generally focused on where the biggest risk lies with the product application so that the team can fully comprehend and mitigate it. 

Planning to Test

Test planning challenges often occur when there is no proper understanding and appreciation of product requirements.  Scheduling can also be hard to define as failed tests require extended timelines, redesign, and retesting.

Selecting the Test Methods

The tests performed on a product should verify and validate the product design. When testing your product, do whatever is needed to understand how the product will hold up under possible and extreme conditions in its lifetime. 

Managing and Controlling the Test Process and Data

Crucial to successful testing is controlling the test methods. As you test, make sure that you are in control of the methods and the variables involved. The less control you have, the lower the quality of your data.

Capturing test data in an organized manner will help you analyze the data efficiently and make design decisions accordingly.

The Cost of Product Testing

As with any business activity, product testing comes with upfront costs. Depending on the types of products for testing, what is the testing for, and some other factors, testing costs can vary. Here are some cost considerations:

Cost of Prototypes and Product Components

Some product tests require the destruction of the product or the prototype. Prototypes are not cheap during product development. In many cases, the test requires additional prototypes and some spare parts available to enable repairs. The more units you test, the higher your costs will be, but the better your confidence in the outcome.

Custom Fixtures

Product testing often requires customized test fixtures – complex tests mean complex fixtures, which will mean increased costs.  It is important to not over-engineer a product if there isn’t a reason to.

Ancillary Test Equipment and Other Costs

Most product testing will require the use of test equipment that you will need to either rent or purchase. Some testing laboratories can provide the ancillary equipment needed for the test. Other costs may include shipping of the prototype or product to the test facility and the cost of traveling to the test facility with your product, and the resource costs for personnel involved in testing, including salaries.

Lab Cost

This comes with a big price tag.  The type of test you perform will also impact the duration of testing, together with the cost. For example, highly accelerated life testing (HALT) allows quick discovery of a product’s weaknesses during the design phase or development stage. Using this test gathers faster results within a week,  than using some traditional testing methods which can take more time to generate results.  

Working with an experienced product development company can help you reduce the amount of testing time as they may be able to do it in-house. 

In-House Testing Costs

You could also opt to test your equipment yourself in an in-house facility instead of working with an outside product testing lab. This approach comes with may mean higher up front costs for equipment or a lower fidelity test if your testing environment doesn’t meet the same standards.

The Costs of NOT testing

While there are significant costs that go with product testing, the costs of not testing a product can prove to be much higher:

  • Increased Product Development Time
  • Increased Product Failures and Defects
  • Increased Repairs and Returns
  • Potential Lawsuits
  • Legal Issues Due to Non-Compliance
  • Missed Market Share Due to Reduced Product Quality

Generally, the cost of product testing depends on what type of testing you do, how thorough you would want the test to be and the statistical confidence you want in your results, how complex the test will be, who needs to be involved, and what testing equipment needs to be acquired for testing to take place.

Let’s Recap

We’ve covered a lot in this article and as you can see, product testing is a very broad area that’s dependent on the product, the application, and the use case. Just remember to keep a few things in mind when approaching this for your own product:

  • Test throughout: doing product testing earlier in the product development process can save considerable time and costs by uncovering issues early on
  • Use different tests: different tests are suited to different products and different parts of the design process – do what suits your product at this point in its development
  • Refrain from making assumptions: keep an open mind, confirmation bias is a very real thing – trust the numbers
  • Test successful products: a successful product can have flaws too, so don’t idealize

If you want to learn more, check out our blog on product certifications and prototyping or learn about the process Ventrify uses to bring our client’s products to market here.

About the Author

Ventrify is a product design and manufacturing firm that helps entrepreneurs bring product ideas from concept to market. We take in fledgling ideas and bring them through our iterative design process to create products our clients can be proud of. Then, we work with manufacturing facilities worldwide to bring our clients the highest quality products at competitive prices.

If you have questions about using prototypes in your product development journey or need help, reach out to us through our Website, Facebook, or LinkedIn.
When you have an idea for a new product, the excitement is tangible. Whatever your product is, you need first to make sure it’s actually worth investing the time and effort into. If you don’t, then you risk ending up with failures like the famous Coolest Cooler disaster on Kickstarter.

Many entrepreneurs are unfamiliar with the process known as product validation. Anxious to launch prematurely, they shy away from doing their due diligence. Sure, it can be hard to let go of an initial business idea but is much better to adopt a philosophy of “fail soon, fail quickly” and embrace the many iterations of product development.

And so today, we’ll learn about what product validation actually is, why it matters, and how to implement it in an effective way.

What is Product Validation?

Product validation is the process of checking if a product meets customer needs and is likely to be profitable. Many product ideas never make it to market, especially if they aren’t validated.

With in-depth research and prototyping, you will work your way to a Minimum Viable Product (MVP). This is basically just a test version made with the only most essential features. An MVP helps you determine which of your product’s features are of value to customers, so you can serve them as efficiently and profitably as possible.

For example, let’s take a simple product like an electric toothbrush. The main purpose is to brush your teeth, so your MVP should be able to do that. Anything else is extraneous. While it might be nice to have a hidden floss compartment, it’s not crucial. By creating an MVP, you can see what is necessary—and what is not.

Inspector Gadget is a cartoon for a reason; he’s not very realistic in day-to-day life.

Why Product Validation Matters

In 2004, Eric Ries learned the importance of product validation the hard way. For those of you who don’t know, Eric Ries is a software engineer and entrepreneur who launched an online reality world and social networking platform known as IMVU. The platform allowed users to create 3D avatars and interact with each other in a digital space.

His initial release of IMVU came after 6 tireless months of development and product creation. Much of that time was spent integrating all of the other instant messaging services available at the time into his platform because he assumed this was what customers wanted.

After the launch sadly flopped, he did interviews with target customers and he realized his key assumption had been incorrect. People weren’t inviting friends through other instant messengers because they didn’t yet know if IMVU was any good—but they were willing to download IMVU as a new and separate service to try on its own. From this painful experience of wasting 6 months, Eric Ries learned a lesson in product validation that we can all learn from.

Product validation is critical not only from the perspective of a company’s team and investors—but for the benefit of consumers. A strong customer focus and dedication to understanding their needs mean you’ll be far more successful.

Another aspect of product validation that many fail to consider is that it can be a great time to grow brand awareness. Getting feedback on your early prototypes is a way to get your customers involved and be a part of something. Many Kickstarters, for example, create social media pages and focus their community to build relationships with future customers.

How To Do Product Validation

Product validation can be broken down into four basic pillars. We must first validate the problem that the product will attempt to solve, examine the market for the product, prototype the product itself, and assess buyer willingness.

Whether you are preparing to sell physical products, like merchandise, or digital products, such as software tools, you need to make sure it’s a viable idea And so, here are some basic steps to consider:

1. Problem: If you haven’t yet, find your first 5-10 people who are enthused by how the product idea could help them. This is evidence a real pain point exists. From there, interviewing can be done to dive deeply into the relevant problem.

Another way to do this is to observe the issue in real-time. For instance, you might sit in on a business meeting where workers are struggling with technology limitations that your software idea could solve. Many inventions came out of simple observation.

Lupe Hernandez, a student nurse, is one such story of this. While on shift, she saw the need for hand sanitizer in places where there was limited soap and water access. That observation would eventually lead to the invention of hand sanitizer.

2. Market: Next, you need to conduct market research to see what the current state is by getting information from your potential customers.

You can conduct market research in a variety of ways. Many businesses do it in-house but you can also hire a third-party company. Here are some of the ways to gather market research:

  • Surveys
  • Product testing
  • Focus Groups

Let’s use the example of a new type of mop. You might do surveys online asking people what they look for in their cleaning supplies and what problems they have. You could also lookup forums online to see what people are saying and even in the product reviews of competitor mops.

3. Product: After you’re sure your product idea can fill a gap in the market, it’s prototype time. For your very first prototype, think of something you could put together quickly. As you iterate on your prototypes and increase the complexity, you will need to keep testing them. You’ll also need to seek out early beta-testers for feedback.

Prototyping is vital in making sure your product works—and does what you’re promising it does. We always recommend working with a product design firm to help you bring your product idea to life. They’ll have the knowledge and skills to help you through the product design and development phase easily.

4. Buyer willingness: Finally,  you need to assess if your potential customers are actually going to buy your product. You can also identify their Willingness To Pay (WTP), which is the maximum price your customers would pay for your product.

To identify this, you can again conduct research a few ways:

  • Survey and Focus Groups: Asking customers directly what they would pay.
  • Competitor Analysis: Assess competitor pricing to help guide your own.
  • Conjoint Analysis: A specialized type of survey where customers rank each feature with numerical value.
  • Experiments & Testing: Adjust your pricing and see how sales are impacted.

Product validation is nonlinear. At any point, a test may fail and need tweaking. If you end up stuck at a given stage, you will know to either regress to a previous stage of validation, or quit and start from square one. Delegation is your friend here.

And if you need help, there are plenty of product design firms out there who will take on all the prototyping and user testing, and bring more objectivity to your decisions. They’ll guide you through the process and make sure you’re doing everything right.

Once your product has passed all this and is validated, you can be confident it’s time to go to market and bring your idea to fruition.

Key Takeaways

Product validation is how you pave the right path to solving a real customer problem. It is rare for anyone’s initial product idea to strike gold, but it helps to remain curious, open, and customer-focused through the stages of development.

What you ultimately end up with is a product idea that passes every conceivable test and will actually fill a gap in the market. With product validation, you’ve ensured your product idea is not going to be a flop.

We’ve helped our clients bring their product ideas to life, and we can help you do the same. Reach out today and we’ll help you with everything from product validation to prototyping.

About the Author:

Ventrify is a product design and manufacturing firm that helps entrepreneurs bring product ideas from concept to market. We take in fledgling ideas and bring them through our iterative design process to create products our clients can be proud of. Then, we work with manufacturing facilities worldwide to bring our clients the highest quality products at competitive prices.

If you have questions about using prototypes in your product development journey or need help, reach out to us through our WebsiteFacebook, or LinkedIn.

Article by Victoria Fraser

Want to boost efficiency and cut down on costs within your product development? We certainly do. That’s why today we’re diving into the small batch production method and why product design firms like ours are switching to this model.

Product designers and manufacturers have used the traditional models of manufacturing for decades, but some companies are trying something different. Today’s brands are seeing the benefits of running small batches instead of large batches and there are plenty of reasons why they’re doing so.

But first, we’ll define it for you.

What is Small Batch Production?

Small batch production is a process during the manufacturing phase where your product is created in specific groups and smaller quantities than traditional batch processing. During the manufacturing process, each step starts and finishes before proceeding to the next one.

Similar components are produced together to allow for more flexibility than traditional large batch production methods because you change the next batch easily if you need to. It also increases efficiency when compared to a continuous manufacturing process where many different steps are occurring at once.

For example, let’s imagine you are manufacturing a children’s toy with various pieces, like a dollhouse. After uploading the specs, the factory makes 10,000 dollhouses with furniture and sends them to you. Once you get the product, you realize the design was too small and is a choking hazard. Now, you’ve got 10,000 dollhouses that you can’t use.

Instead, with a small batch model, you can catch errors and make changes more easily with each version of your product. That’s just one of many reasons to use it, but there are plenty of others.

Benefits of Small Batch Production

While it might seem groundbreaking it’s actually been used for a long time. The fast-food industry and clothing industry are just a few that manufacture their products in small batches.

Taking inspiration from car manufacturing plants, McDonald’s famously implemented their “Speedee Service System” back in their early days to beat their competition. Their fast processing time and low-cost strategy lead them to become the international fast-food giant they are today.

Let’s see how smaller batches can improve your product development process.

Improves Quality Control

Remember that epic cooler from Kickstarter? Well, what wasn’t so epic was that their product completely failed to live up to the expectations and many buyers never even received their product.

If you have an issue with your design, you can catch it a lot sooner with small batch processing. Ideally, you fix it before it reaches the end consumer. However, if it does make it into their hands, you’ll at least know it may only be a small number of products that suffered.

More Flexibility

Since you’re more flexible in your manufacturing princess, you can make changes on the fly. If a new trend comes along, you can tailor your product to it. Additionally, if initial user feedback shows there’s a simple feature missing that would make their lives easier, you can add it in for the next batch.

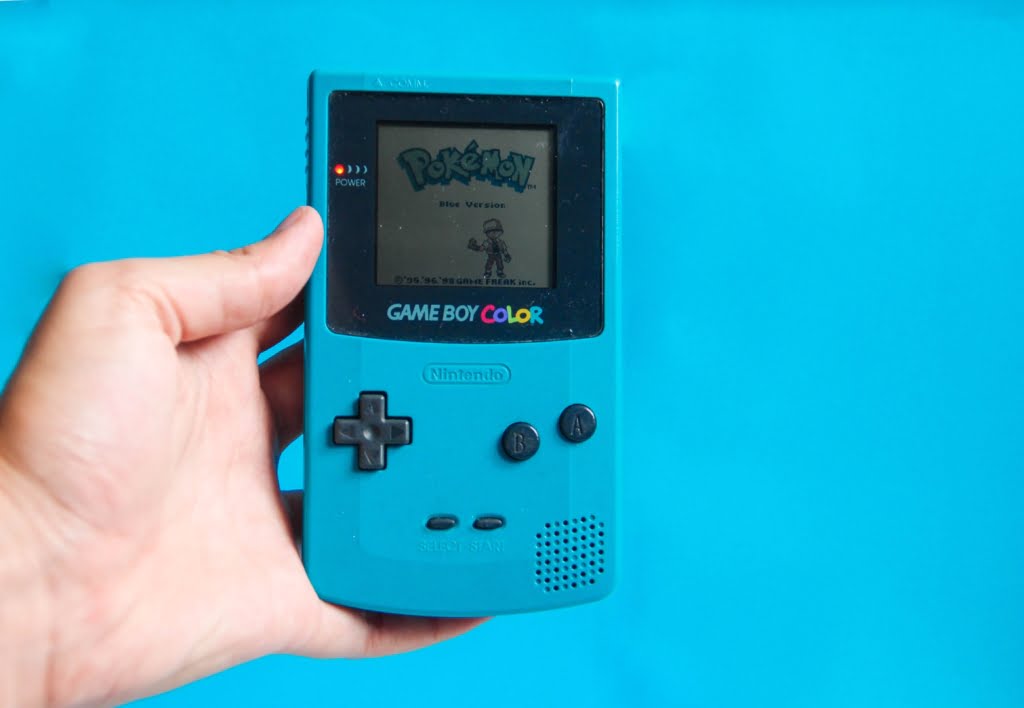
Remember when jewel tones were all the rage in the 1990s? For video game manufacturers who saw how successful colourful Gameboys were, they could’ve responded quickly and captured part of that market by releasing their own colourful versions of handheld games.

Plus, when things go wrong—as they inevitably do—you can react act easily and quickly with a small batch method. If your supplier for one part is suddenly unavailable, you can find a new one for that part asap.

Better Affordability

For first-time inventors and product designers—cost is everything. Thankfully, small batch manufacturing lets you save money, meaning you need less funding when it comes to your startup costs. This allows you to focus more efforts on other aspects of your business like marketing and advertising.

Because you’re producing fewer components and parts, small batches are cheaper to manufacture. On top of that, they take up less storage space. That means you don’t need huge warehouses to store your product because there just isn’t as much of it.

Increased Efficiency

Finally, our last point is that small batch production is a huge time saver. You can test your components in small batches more often to catch errors and greatly improve the function of the end results.

It also allows product designers to focus on one project at a time, reduces things like context switching. Instead of working slowly on multiple tasks or projects, you focus your efforts on one task and produce more efficient and higher-quality results.

We’ve been implementing small batch strategies in our own processes, and it results in faster turnaround time and shortened the product development process for us. Instead of taking years to create a product, we’ve brought our clients’ ideas to life in as little as 3 months.

Downsides of Small Batch Production

Now, nothing is perfect. There are some pitfalls that you can experience when using small batch production methods. Even though there are fewer of them overall, the problems are worth noting.

Here are some of the issues with small batch manufacturing:

More Downtime

Since you’re starting new batches more often, there is an increase in downtime. Each time you change something in your product design, you have to change something on the manufacturing line.

Constant Attention

Because you’re running more batches, you do have to stay on top of it. Instead of placing a factory order for thousands of units and forgetting about it, you have to keep monitoring it.

Small batches require more quality control testing and assurances because you’re making a new batch every time. Even if you’re not changing anything, you still want to ensure it’s working as you intended.

Less Product in Stock

When you have less product available, you’re more likely to run out of it. While scarcity is a great marketing tactic to entice buyers, it’s not great when you miss out on sales. By selling in smaller amounts, you risk lowering your profits just because you ran out.

We saw this when the PlayStation 5 sold out around the world because of supply chain issues caused by the pandemic. While they are creating more models, it still doesn’t look like they’ll be able to fully meet the demand until 2022.

Harder to Find Factories

Finally, it can be difficult to find suppliers when you’re placing small orders. Factories have to adjust their setup each time and when they’re only making a small batch, it’s worse for their bottom line as well.

Also because you’re ordering less stock, you have higher unit costs, too. As such, you’ll either have to raise your pricing or take a somewhat worse profit margin.

Pros and Cons of Small Batch Production

Now that you read them all, it’s easy to see why small batch production is taking over the product design industry. To summarize here’s a quick table on the pros and cons we discussed today:

PROSCONS
Improved Quality ControlMore Downtime
More FlexibilityConstant Attention
Better AffordabilityLess Product in Stock
Increased EfficiencyFewer Factories Available

Key Takeaways

Not every business uses the same model for their manufacturing, but it’s important to consider all the different methods you can use in your product development. For some products, small batch production might be the answer; for others, the traditional model might work just fine.

At Ventrify, we use the latest strategies to design and develop successful products for our clients so they can save more time and money. If you want to learn more and work with us, contact us today.

Finally, if you found this article helpful, don’t forget to share it and subscribe to our newsletter for more useful content like this.

About the Author:

Ventrify is a product design and manufacturing firm that helps entrepreneurs bring product ideas from concept to market. We take in fledgling ideas and bring them through our iterative design process to create products our clients can be proud of. Then, we work with manufacturing facilities worldwide to bring our clients the highest quality products at competitive prices.

If you have questions about using prototypes in your product development journey or need help, reach out to us through our WebsiteFacebook, or LinkedIn.

Article by Victoria Fraser

When you think of product design, shipping might be the last thing on your mind. However, it’s still a crucial part of the process and can affect your profits if done poorly. One aspect of shipping and logistics is incoterms.

Incoterms might seem confusing, but they’re actually not all that complicated. If you’re shipping a product from one location to another, then it’s crucial you understand what they are and how they work.

When it comes to freight shipping, the history is fascinating. From horses pulling carts to container ships transporting literally—tonnes—of goods, we’ve come a long way. Now, the interconnectedness of our supply chains allows us to buy all kinds of products and goods, like pineapples from Hawaii and saffron from Spain.

Logistics management is an entire field of study in itself, and many people dedicate themselves to understanding all the different stages of transportation. While we don’t expect you to be a supply chain manager, you can still benefit from understanding the overview of Incoterms when designing your products.

Fun fact: The first shipping container was only invented in 1956 by American entrepreneur Malcom McLean.

A key part of international shipping is the incoterms, which can be intimidating to a lot of people. Thankfully, we’re diving deep into the topic in today’s guide on incoterms.

What are Incoterms?

In the world of shipping and logistics, Incoterms is an abbreviation of the words: “International Commercial Terms.” These are the terms agreed to by the buyer and seller, which reduces confusion in the shipping process.

They are written as three-letter abbreviated trade terms and were formally established by the International Chamber of Commerce (ICC). As a result, the logistics of international trade are simplified since they clearly communicate different aspects of cross-border trade.

In general, there are a few things major areas that incoterms address:

  • Point of delivery: This defines the point of change of hands from seller to buyer.
  • Transportation costs: This defines who pays for whichever transportation is required.
  • Export and import formalities: This defines which party arranges for import and export formalities.
  • Insurance cost: This defines who takes charge of the insurance cost.

What are the different types of Incoterms?

There are 11 main terms to know when it comes to Incoterms, but we’ll break them down for you. Use these to help the buyers and sellers communicate the provisions of a contract clearly.

Here is a quick table with the different terms and what they entail:

CodeAcronymWhat’s Involved
EXWEx WorksThe seller ensures the goods are at the seller’s premises or another specific location where the buyer loads and clears the goods for export.
FCAFree CarrierThe seller delivers goods either to the carrier, a specific person at the seller’s premises, or another specific location. Any risks passed onto the buyer must be clearly stated.
FASFree Alongside ShipThe seller delivers goods alongside a vessel chosen by the buyer. The responsibility lies with buyers after goods are alongside the vessel.
FOBFree Onboard VesselWhen the seller delivers goods on-board a vessel chosen by buyers. The responsibility lies with the buyer once goods are on the vessel.
CFRCost & FreightLike FOB, except that the seller must pay for the costs and freight to deliver goods to their destination.
CIFCost, Insurance, & FreightSimilar to CFR, except the seller arranges insurance cover against the buyer’s risk of loss or damage.
CPTCarriage Paid ToThe seller must arrange the transportation of the goods to a specific destination, but doesn’t insure them.
CIPCarriage & Insurance Paid ToLike CPT, but the seller is also in charge of insuring the goods.
DAPDelivered At PlaceThe seller delivers the goods to a specific destination, after the goods have been unloaded. The seller has full control of up until the named place of destination.
DPUDelivered At Place UnloadedThe seller delivers the goods ready for unloading at the specific destination. The seller has full control up to the named place of destination.
DDPDelivered Duty PaidThe seller is in charge of all costs and risks relating to the delivery of goods to the buyer’s named place of destination, including clearing goods for export and import, paying duties and any customs formalities.

This list is also organized from the most obligation to the seller (ECW) to the least obligation to the seller (DDP). When choosing, you’ll need to carefully weigh the pros and cons of each one.

How do I choose the right Incoterms?

With so many choices, it’s difficult to know what to choose. While there are a lot of factors to help you decide, here are some general tips to help you.

One common practice in the industry is that you should “buy” FOB and “sell” CIF. That is because there are different benefits and costs with each pricing term, especially as they relate to an importer or exporter.

All that aside, FOB (Free on Board) is, generally, the most popular Incoterm since it provides equal benefits and risks to the buyer and seller.

If you have more experience importing goods and want full control over the process, then EXW (Ex Works) may be the way you decide to go. It does, however, mean that you take on the most risk and responsibility, so we would advise against that if you’re still learning the ropes.

When choosing the right incoterms, you want to get it right. Shipments can face all sorts of problems without the correct incoterm so it’s crucial to think carefully to decide which one is appropriate.

For example, logistics costs could increase, affecting your profits later on. Alternatively, the buyer or seller may not be able to comply with the incoterm causing issues when you go to pick up your goods and they never arrive.

Summary

Not every business uses the same incoterm, so you have to choose based on what’s best for you. Hopefully, this guide expanded your knowledge and boosted your confidence when it comes to understanding incoterms.

At the end of the day, we recommend working with professionals who know what they’re doing so your logistics and shipping processes run smoothly. It might not be the first stage of product development, but it’s an important one!

If you found this article helpful, don’t forget to share it and subscribe to our newsletter for more useful content like this.

About the Author:

Ventrify is a product design and manufacturing firm that helps entrepreneurs bring product ideas from concept to market. We take in fledgling ideas and bring them through our iterative design process to create products our clients can be proud of. Then, we work with manufacturing facilities worldwide to bring our clients the highest quality products at competitive prices.

If you have questions about using prototypes in your product development journey or need help, reach out to us through our WebsiteFacebook, or LinkedIn.

Article by Victoria Fraser

An often overlooked step in product design is packaging; yet it’s crucial. In the same way we all judge a book by its cover before reading it, we also judge a product by its packaging before using it.

Many inventors or entrepreneurs start with the design of a product itself, but the packaging still needs to be enticing to your customers. And so today we’ll dive into the psychology of packaging design. We will also cover some classic examples to take inspiration from in recent years and decades ago.

There is a lot more to consider than just cardboard and tape.

Different Elements of Packaging Design 

When it comes to making the packaging design decisions for your product, there is an overwhelming number of things to consider—colour, logo, font, material, and so on. While it would be nice if there was a one-size-fits-all approach, there, unfortunately, is not.

Let’s take a quick look at some of the different factors to consider.

Colour 

Colour is a crucial part of packaging design. Many researchers and marketers have studied this for decades. In fact, according to one study the four most eye-catching colours that pique our interest subconsciously are red, yellow, green, and pink.

Some other ways in which colour affects us is how black is considered more expensive and browns are considered more natural.

Famed German writer, Johann Wolfgang von Goethe, even published his book on the Theory of Colour in 1810. In it, he talks about how colours can invoke certain emotions in our bodies. By appealing to people emotionally, brands can influence their customers’ purchasing decisions directly. It’s also a great way to create brand recognition. We can all recognize a can of red Coca Cola from far away.

When thinking about colour, it’s overwhelming. Try to reflect on your company values and who you want to attract. Targeting your customer avatar is crucial when making these decisions.

Visual Design

Products that look more aesthetically pleasing are rated as easier to use than their less attractive counterparts. This phenomenon has been noted in design since the first study discovered it in 1996.

While this is often in regards to things like websites or user interfaces, it is still something to keep in mind when designing your packaging. People don’t want to be confused. Minimalism was even one of the top trends in 2020 for product design. Knowing this, it’s important your packaging looks appealing and is not overwhelming visually.

Sustainability

More and more companies are incorporating more sustainable business practices—especially in packaging design. In fact, 66% of people will pay more if a product is more environmentally friendly. Millennials are also a key reason that brands want to embrace more sustainability.

As a result, some companies have created clever packaging solutions for businesses to choose from instead of traditional plastic packaging. Take the company Bloomin as an example. They’ve designed packaging that is biodegradable and plants wildflowers where it is discarded.

Now it’s important to be genuine in your marketing if you do this as some companies have seen this backfire and been accused of “greenwashing.”

Greenwashing is used to describe the practice of companies launching adverts, campaigns, products etc. under the pretense that they are environmentally beneficial. But they’re often in contradiction to their environmental and sustainability record in general.”

—Ethical Consumer

Authenticity is crucial in the modern era we live in, so make sure your brand is intentional with its decisions and accurate, or else it will backfire. Not all press is good press after all.

Copywriting 

Not only is the logo important, the writing (or copy) on your packaging is also crucial. If your writing is snazzy, then often you’ll get free advertising through amused customers who share it on social media. Using humour is just one example of a great way to stand out among the other brands.

The writing on the packaging is also a direct connection with your customer. It’s the perfect palace to convey your voice and showcase your brand identity. We all remember those sticks of pink Dubble Bubble gum that had comics tucked inside right? Maybe you didn’t even like the gum, but you probably liked the comic.

Of course, your writing should always be clear, but don’t be afraid to add personality if it suits your audience. In the case of the comics in the gum, it was a genius way to connect to kids at a candy store while hiding a special message under the wrapper.

Practicality

Yet another aspect to consider is how the packaging might improve the use of your products as well. Sometimes, the packaging itself can become the product!

One you might not have noticed is that the Classico pasta sauce jars have measurements on the side of them for you to use while cooking. They also launched a social media campaign encouraging people to reuse the jars instead of simply recycling them.

And this isn’t a new idea, brands have been doing things like this for decades.

In the 1930s, flour companies learned that parents were using the fabric from their packaging to sew clothing for their children. Brands responded by packaging their products with more colourful and fun patterns as a result.

Doing something clever like this is a great way to stand out among the other brands.

Certifications

A final key aspect to include on your packaging is any certifications for your product. Depending on the products and industry, there are a variety of markings or stamps that would be required on your packaging.

Without these, your product can’t legally be sold in some countries. For example, in the U.S.,  you need to comply with The Fair Packaging and Labeling Act (FPLA) and Uniform Packaging and Labeling Regulation (UPLR). Imported goods also have to follow certain packaging requirements like Title 19.

It might seem overwhelming, but thankfully there are packaging specialists who make sure these different requirements met.

Here are the most important things often required:

  • Product Identity Declaration: This just explains what the product is and how it functions.
  • Net Quantity Declaration: This covers the size of the production in weight if it’s liquid or solid or in a numerical quantity.
  • Dealer’s Name and Principal Place of Business: As in most places, it’s required that the location the product was manufactured is listed.

When it comes to Canada, there are also a few unique packaging requirements. Since the official languages are English and French, all products must have bilingual packaging to be sold across the country.

Summary

While this is just a handful of different elements to consider, there are plenty more ways to create standout packaging that appeals to your customers. At the end of the day, we recommend thinking strategically about the demographics of your customer to make sure it resonates with them.

Not every brand will have the same packaging solutions (and if they did we would all be disappointed!) Hopefully, this article opened your eyes to the ways to freshen up the look of your products once they hit the shelf.

If you found this article helpful, don’t forget to share it and follow us on social media for more useful content like this.

About the Author

Ventrify is a product design and manufacturing firm that helps entrepreneurs bring product ideas from concept to market. We take in fledgling ideas and bring them through our iterative design process to create products our clients can be proud of. Then, we work with manufacturing facilities worldwide to bring our clients the highest quality products at competitive prices.

If you have questions about using prototypes in your product development journey or need help, reach out to us through our WebsiteFacebook, or LinkedIn.

Article by Victoria Fraser

If you have wondered exactly how a product travels from a large industrial factory to your kitchen counter, then today’s blog post will help clear that up. Cell phones don’t grow on trees after all. Today we are going to dive into this process with some tangible examples that make it easy to understand. In this article, we will go over the different stops your product makes along the way and the decisions you will need to make on its journey.

First, let’s start with a little roadmap. This is a very common path your product might take after it’s been designed and is ready to make the long trip from a factory overseas to the shelves at a local shop.

Suppliers →  Manufacturer → Distributor → Retailer →  Consumers 

There are a lot of ways the supply chain can look, but today we want to focus on the supply chain in corporate businesses that involve manufacturers. We will look at what happens at each of these stops and the various paths a product takes.

Step 1—Suppliers

Before a product is even put together, you will need supplies. The supplier provides these raw materials which are then assembled and combined in a way to make the product itself. There might also be other suppliers and stages as well, but for now let’s just clump them together as one.

Once you find a factory or manufacturer to work with, you probably won’t be involved in choosing a supplier, but it helps to see the whole picture. For example, if you are selling an umbrella, then it is made up of fabric to keep the rain off and plastic or metal to provide the structure.

Step 2—Manufacturer

After you have made a prototype, you need to look at samples. Factories can send samples much quicker than they can  regular products because a sample isn’t meant to be sold, so there is no need for taxes or tariffs. Import and export laws are designed for large quantities of goods, so that’s why samples can get around this loophole.

You might go through 2 or 3 revisions of the product before you are ready to place your full order. In fact, the samples are likely to be destroyed as they undergo things like testing. These tests might be performed by your own team or a third party to meet certain certification requirements.

If we continue with the example of the umbrella, maybe the fabric wasn’t as waterproof as needed and so in testing it was destroyed as a result. Knowing that flaw, you would make the necessary changes and ask for another sample.

Here is a quick breakdown of how that might look:

Sample→ Tests & Certifications → Revisions→ More Samples → Approval → Place Order

Luckily, because you are only ordering a handful of the product, you can get them quickly to speed up the process. After tweaking it, you’ll eventually get to place your order with the factory, which should take about a month.

Shipping & Logistics

When it comes to logistics, we’ll only be able to scratch the surface. Some people spend years studying this. Once your product is created and packaged, you have to make a decision on how to transport it. Even deciding on the packaging is a complicated process, but we will cover that in another article.

Let’s look at the different ways to ship your product overseas. There are 2 common methods used to transport your goods, by Air Freight or Ocean Freight. Many companies might use both for different products, but what you need to know is each one has its own pros and cons. Both have to follow their own set of rules and regulations that they have to abide by.

Here is a table to compare the two:

VariablesAir FreightOcean Freight
TimeFasterSlower
CostMore ExpensiveLess Expensive
ReliabilityMore unpredictableMore predictable
DestinationsMore Options InlandMust Arrive by Port
How they ChargeBy WeightBy Volume

If you were shipping something small and light, then sending it by air might make sense. By comparison, if you are shipping a larger quantity of something bigger and heavier, then it’s preferable to send it by ocean. Obviously, there are a number of factors that will affect your decision at the end of the day.

As we recently experienced the Suez Canal Crisis, you might end up having to switch methods due to unforeseen circumstances. When shipping things internationally, not everything is in your control, so it is important to ensure you keep this in mind, especially when drafting your budget.

Customs

After it travels by sea or by air, your product will also have to go through customs when it’s crossing international borders. There are 4 basic steps that occur when the products are being imported into a country like Canada:

  1. Entry. The first thing you need to do is determine how your product comes into the country and where.
  2. Examination and valuation. Once it arrives at the border, it’s then looked at to ensure it’s legal and the value is also evaluated so that duties or tariffs can be applied.
  3. Classification. After the cost is calculated, the product is classified and you can then find out the percentage of tax that is going to be charged.
  4. Payment and liquidation. At this stage, you will have to pay any tariffs or duties to bring it into the country.

There are a lot of forms and paperwork at this point, so you can experience delays if things aren’t filled out correctly. As you might expect, there are people who spend years studying this and keeping up with the laws and regulations.

Some companies even find loopholes to avoid paying certain taxes and there are plenty of humorous incidents that have been reported as a result. One Ukrainian importer found it was easier to cut their cars in half and import them as “car parts” instead of cars because the taxes were lower. They then reassembled the cars after they arrived at their destination.

Step 3—Distributors

Now that the product has passed through customers, it will go to a distributor. At this point, it will likely go to a warehouse or a wholesaler. Let’s look at how that looks for both of those scenarios.

After everything arrives at a warehouse, you can start sending the product in 2 different ways. These are both considered examples of the order fulfillment process, which consists of receiving and processing the goods so they can be distributed to customers.

  1. In-House Fulfillment. Fulfilling the orders yourself.
  2. Outsourced Fulfillment. Hiring another company to fulfill orders.

When you ship the products yourself, it’s also referred to as Fulfillment by Merchant (FBM). Conversely, you could work with a large company like Amazon to distribute your products. Fulfillment by Amazon (FBA) is a popular option of outsourced fulfillment by many, but you should know that they will take a percentage of the sales. These types of  fulfillment centres will also charge a storage fee as they have to make space to store your product until it is sold.

Another way to distribute your product is through a wholesaler. People sometimes use the term interchangeably with distributor; however, a wholesaler is a company that acts as an intermediary between the manufacturers and retailers. Wholesalers will buy the products from a manufacturer in bulk, then sell them to the retailers.

There are many different types of distributors and wholesalers out there helping you get your product in the hands of your consumers. Similar to shipping, you need to weigh the costs and choose what is best for you.

Step 4—Retailer & Consumers

Finally, after a few months of sitting in shipping containers traversing the ocean and bumbling around on trucks from warehouses to stores, the product winds up in the hands of your customers. It’s a complicated and convoluted journey, but we hope that we have demystified it for you.

While it might seem daunting, we wanted to show the whole process and the different paths a product can take on its journey after it’s designed and ready to go. You might think you can jump straight from placing the order to marketing, but there are a lot of steps after you’ve ordered your product from the factory.

If you found this article helpful, don’t forget to share it and subscribe to our newsletter for more useful content like this.

About the Author

Ventrify is a product design and manufacturing firm that helps entrepreneurs bring product ideas from concept to market. We take in fledgling ideas and bring them through our iterative design process to create products our clients are proud of. Then, we work with manufacturing facilities worldwide to bring our clients the highest quality products at competitive prices.

If you have questions or want to discuss going remote, reach out to us through our WebsiteFacebook, or LinkedIn.

Article by Victoria Fraser

If you’re an entrepreneur wondering about the product design process, your first question is probably how long does it take? There are a lot of steps between coming up with an idea and actually selling your product. After all, you need to make sales if you hope to get your money back.

Taking your product to market is exciting, but too often many of us want to start designing it right away. That’s not where the journey actually starts and we’ll explain why.


Phase 1: Research & Planning

Before you can begin the design phase of your product, you need to do a marketing report. This is a collection of data from different sources that will help you decide if the product idea is something worth pursuing.

Here are just a few factors you’ll consider before knowing if you have a good idea.

Competition

Is your product a completely new invention? Probably not. There’s nothing wrong with creating something that already exists, but you need to look at how many other companies out there are solving the same problem. In marketing, this is referred to as Points of Similarity.

If there the market is oversaturated, you will need to ensure your product has important points of difference that will make it stand out. Not surprisingly, this is referred to as Points of Differentiation in marketing. Looking at these different things helps you position your brand in the eyes of your consumer.

Target Audience

Who are you trying to sell your product to? Often people like to think their product is for everyone because that means you have a larger audience. This isn’t the best strategy because people won’t have a clear connection to your product. It’s better to have a focused target audience so you can market to them personally and speak the same language.

Would you sell pens to people who work in an office the same way you sell pens to an artist who works at home? Not likely. Different target audiences will have different needs and concerns. To be the most successful, you want to focus on who your audience is and how you will market to them.

Cost

How much will it cost to make your product? Let’s say you have an idea for an amazing new rain jacket that has a ton of features. You’re going to sell it to sailors who need the best gear for their watersports. It’s waterproof, lights up, has tons of pockets, and even a built-in life jacket! Well, that’s probably going to cost a lot more than a normal rain jacket. Is this justified enough that your target audience will buy it, or are they going to stick with what they already have for cheaper?

After looking at all the different variables of your product idea to see if it’s viable, you’ll know what to do. Sometimes, you won’t pass phase one. That’s alright. It’s better to scratch a bad idea before investing too much time and effort into it.

According to a study from Harvard, there are 30,000 new products designed and sold every year, but over 95% of them fail. That’s why product research is so important. Many people skip this step which can affect their success in the long run.

Approximate Timeline: 1 – 4 weeks

Phase 2: Prototyping

Everyone loves this step, and you might have even started putting things together in your garage if you’re an inventor. At this point, you’ve decided you want to pursue your idea and create a fantastic new product.

If you’re a small business owner, it might only be you and a small team creating the prototype. If you’re a large corporation, then there might be a whole team of developers and designers collaborating to create a new product.

In either scenario, you’ll create the first prototype and then some iterations of it until you finalize the product. Depending on the complexity of your product, it can take a short amount of time or a longer amount of time. If there are many electronic components, then you will likely add an extra 2-4 weeks to this stage. Of course, it can take a lot longer than that, the Dyson vacuums are an example of that.

James Dyson spent 15 years perfecting his vacuums until he was satisfied.  He made over 5000 prototypes throughout the product design process. While that’s an extreme example of how long it takes to design something, it does happen.

At Ventrify, we try to do this step efficiently so you’re able to move forward quickly. Many companies can take a lot longer to do this step.

Approximate Timeline: 1 – 8 weeks

Phase 3: Sourcing & Logistics

At this stage, you have a solid prototype and you need to start contacting factories that will take your product and scale it up. If you’re working with a company like us, we’ll have plenty of contacts in the industry that we can recommend. We will always help you find the best factory to work with.

Then, they take your product and find out how to create it on a factory line. They’ll customize their machines to create your product. At this stage, you need to make sure you have the funds to pay the factories to create your product. If not, you aren’t going to get very far.

Often while this is going on in the background, your team is sorting out logistics and pricing as well. Many factories exist overseas in other countries. While it might seem simple to bring over your product in a shipping container and start selling it, it’s not that easy.

With tariffs, imports fees, and taxes on certain types of products, this can get complicated quickly. Even importing something as simple as shoes has its drawbacks. Because of that, you might decide to change certain aspects of your product. Many companies have found creative solutions to address issues like this.

Have you ever wondered why Converse shoes have a thin layer of felt on the bottom? It wears off after a few weeks outside and you can’t see it while walking, so the felt serves no practical or aesthetic function. Converse does this actually because of taxes. By adding a small amount of fabric, the sneakers are technically categorized as slippers. At some point in the design process, the brand discovered that slippers have lower import tax than shoes, so they added felt as a workaround.

Approximate Timeline: ~ 4 months 

Phase 4: Production

After you’ve chosen a manufacturer to create your product, you have to wait for it to be produced. Now, you might think that a large project takes longer than a small project, but in our experience, the amount of product you order doesn’t affect the timeline as much as you think it does.

If you think about it from the manufacturer’s point of view, they have to change all their machines each time they create a new product. Regardless of producing 1000 or 10,000 copies of your product, the set-up time is likely to be the same.

For a larger project, the manufacturer might start on your project sooner to get it done quickly as they’ll make more money. For a smaller project, you might be added to the queue until a day when they have time to do small batches all at once.

This step can get messy for various reasons:

  1. Laws & Random Factors—This is often outside your control. With Covid-19 we have seen a lot of disruption in the shipping industry, not to mention the Suez Canal incident which cost an estimated $400 million per hour in goods delayed.
  2. Product Certification—You can’t sell your products until they pass certain testing and certification requirements which also add time to this step.
  3. Customs—Some countries are a lot stricter with their customs than other countries.

This phase can be quick, but it can also last longer than you expect. You also design the actual packaging for your product and optimize it to fit in the shipping containers when you’re bringing it over. While it’s at the factory, you will still have a lot to sort out.

Approximate Timeline: At least 6 weeks

Phase 5: Shipping & Distribution

At this point, the product has been designed, produced, and is landing in a warehouse. After it’s in the warehouse you’ll now be in contact with a distributor who will then get your product in stores or in your consumers’ hands directly.

Once you’ve made it this far you are going to focus on selling the product and marketing. At Ventrify, we’re no longer involved anymore. You’ll be working with your distributor to make sure shipping to your customers and buyers goes smoothly.

***

Now, to answer a complicated question, your total timeline from an idea to going to market can take anywhere from 3 to 16 months. Problems can arise as well lengthening the process even if you’ve planned it out from the start. There are a lot of decisions to be made which is why it takes so long.

While there are a lot more steps including marketing and selling your product, we wanted to focus on the product design process itself.

We believe in transparency and sharing practical advice to help entrepreneurs and inventors be successful. If you’re looking for more information on product design and development then make sure you’re subscribed to our newsletter.

About the Author

Ventrify is a product design and manufacturing firm that helps entrepreneurs bring product ideas from concept to market. We take in fledgling ideas and bring them through our iterative design process to create products our clients are proud of. Then, we work with manufacturing facilities worldwide to bring our clients the highest quality products at competitive prices.

If you have questions or want to discuss going remote, reach out to us through our WebsiteFacebook, or LinkedIn.

Article by Victoria Fraser